
Monday 17 December 2012
Wednesday 12 December 2012
Tree ornaments!
Have seen so many different Christmas crafts going on this week in the day homes that have been visited that it seemed a good idea to blog about some ideas for Christmas tree ornaments!
Such a great idea for the children in your day home to give as gifts to their parents and you know they will be well loved and adorn the family tree for many years to come!
Candy Cane Ornament.
 All you need is 3 pipe cleaners and a piece of ribbon to make these cute Christmas tree decorations - and they should last longer than real candy canes!
You will need:
Red, green and white pipe cleaners
Cord or ribbon to hang
Instructions:
Take a pipe cleaner of each colour and twist them together. Cut the length in half.
Shape each half into a candy cane. Tie a piece of cord to the top of each cane to hang it. Simple and quick!
Santa handprint ornament.

Take the cut out red craft foam hand and trace it onto the piece of white felt. You will need to trim this down to fingers only for use as Santa’s beard. Also from the white felt, cut out a strip to be the fuzzy edge of Santa’s hat. (see photo for guidance)
From the pink craft foam, cut an oval to size to fit on the palm of your child’s hand print. This is Santa’s face. (see photo for guidance)
As necessary, trim all pieces to fit onto your child’s hand print and glue into place. (See the above photo for placement of each piece.) Use the red marker to add Santa’s rosy red nose. With the one hole paper punch, punch one hole near the top of Santa’s hat. Insert the pipe cleaner through the hole and bend into a hook as an ornament hanger.
Now you have an adorable Christmas tree ornament and a keepsake of your child’s hand.
Popsicle stick trees.


You will need:
2 candy canes
Double sided sticky tape or glue
Wide ribbon
Instructions:
Stick the ends of the candy canes together to form your heart shape.
Tie a ribbon bow around the top of the heart.
If you want to hang the heart, tie the ends of the bow together to make a loop. Or you can give the heart as a quick and easy gift.
Such a great idea for the children in your day home to give as gifts to their parents and you know they will be well loved and adorn the family tree for many years to come!
Candy Cane Ornament.

You will need:
Red, green and white pipe cleaners
Cord or ribbon to hang
Instructions:
Take a pipe cleaner of each colour and twist them together. Cut the length in half.
Shape each half into a candy cane. Tie a piece of cord to the top of each cane to hang it. Simple and quick!
Santa handprint ornament.

Material needed for child's Santa hand print Ornament
A sheet of red craft foam large enough to trace your child’s hand onto
* a small piece of pink craft foam
* a small piece of white felt large enough to trace your child’s hand onto
* one small white pompom
* two goggle eyes
* glue
* red marker
* one pipe cleaner, your choice of color
* a one hole paper punch
* a small piece of pink craft foam
* a small piece of white felt large enough to trace your child’s hand onto
* one small white pompom
* two goggle eyes
* glue
* red marker
* one pipe cleaner, your choice of color
* a one hole paper punch
Instructions for your Santa Handprint Ornament:
Trace your child’s hand onto the piece of red craft foam. If your child is young and it is difficult to hold his hand steady in order to trace, first trace his hand onto a piece of paper. You can then use the cut out paper hand to trace onto the red craft foam. This simply prevents a lot of stray marks on the red craft foam.Take the cut out red craft foam hand and trace it onto the piece of white felt. You will need to trim this down to fingers only for use as Santa’s beard. Also from the white felt, cut out a strip to be the fuzzy edge of Santa’s hat. (see photo for guidance)
From the pink craft foam, cut an oval to size to fit on the palm of your child’s hand print. This is Santa’s face. (see photo for guidance)
As necessary, trim all pieces to fit onto your child’s hand print and glue into place. (See the above photo for placement of each piece.) Use the red marker to add Santa’s rosy red nose. With the one hole paper punch, punch one hole near the top of Santa’s hat. Insert the pipe cleaner through the hole and bend into a hook as an ornament hanger.
Now you have an adorable Christmas tree ornament and a keepsake of your child’s hand.
Popsicle stick trees.

These craft stick Christmas tree ornaments are a really simple craft to do with the kids or your class. They'll look great hanging on your Christmas Tree.
Materials:
Materials:
- green craft sticks or Popsicle sticks(or paint your own)
- glue
- brown paper or felt
- scissors
- sequins, spangles, dazzle stars, sparkly stickers etc.
- ribbon or plastic cord
Directions:
- Color your sticks green beforehand or buy colored ones.
- Glue three craft sticks together in a triangle.
- Cut a small rectangle from brown paper or felt and glue to the back.
- Glue spangles and other decorations on the front.Bu a sparkly star on top. Allow to dry.
- Tie a ribbon or cord on top to hang on the tree.
Candy Cane love heart.

You will need:
2 candy canes
Double sided sticky tape or glue
Wide ribbon
Instructions:
Stick the ends of the candy canes together to form your heart shape.
Tie a ribbon bow around the top of the heart.
If you want to hang the heart, tie the ends of the bow together to make a loop. Or you can give the heart as a quick and easy gift.
Wednesday 5 December 2012
Snow painting!

Here is a fun activity that you can do in any kind of snow. It doesn't cost a lot of money or require a lot of equipment.
First you will need to get these supplies:
 |
|
The next step is to put water into each bottle and add the food coloring.
 |  |
| Once your bottles have water and food coloring in them, put the top on and shake it to mix up the color with the water. Make sure that the top is on tightly so that you don't get food coloring on your clothes. |  |
Then go outside and have fun painting the snow!
Frozen water balloon activity!

All you need is some balloons, water and food colouring!
- Fill the balloon with water
- Add a drop of food colouring and tie balloon
- Place balloon in freezer or on a cold day even outdoors
- Once frozen remove balloon to reveal a frozen, colourful ball of ice that looks like a giant marble!
Monday 3 December 2012
Christmas stars!
With the countdown to Christmas having begun our thoughts turn to Christmas activities and crafts! Below are two great and simple ideas for Christmas stars! These ideas came from www.activityvillage.co.uk, check out this great website for other Christmas ideas!

You will need:
Construction paper
Gold or yellow paint
Instructions:
Keeping your fingers together, print 5 handprints in a circle, palms overlapping and fingers pointing outwards.

Once you have made your Christmas star decoration with lollipop sticks, the kids can go wild with their choice of decoration!
You will need:
6 lollipop sticks (popsicle sticks) - we used pre-coloured but you could paint plain sticks before you begin
PVA (white) glue
Ribbon for hanging
Decorations - metallic pain, sequins, jewels, glitter, metallic pens etc
Instructions:
First make your star. Assemble two triangles, using dabs of white glue at the end of the sticks. Catch of loop of ribbon between two of the lollipop sticks so that you can hang your star.
When dry or nearly dry, position one triangle on top of the other and use large dollops of glue at the places the two triangles join. You will need large dollops of glue because the triangles don't lie completely flat!
When dry, decorate your star!
Great activity idea website!
If you are a visual learner and find it difficult to follow written instructions for craft and activity ideas then this may be the perfect website for you!
Cullen's ABC is a website that contains a vast number of instructional videos on you tube plus a variety of other activity ideas.
You get to see the craft being constructed from start to finish! You also see a variety of other activities being carried out!
A great website to add to your favourites!
www.cullensabc.com
Monday 26 November 2012
Simple advent calendars.
The run up to christmas is such an exciting time and for most children does not go quick enough!
An advent calendar in your day home could be a great way of helping this time pass for the children. Here are some easy, simple ideas you could do with your children.
 How about a jar full of good deeds? You could open the jar each morning and pick one to do! Or alternatively it could be filled with simple, fun activities such as read a christmas story, bake some cookies!


Finally, how about this simple envelope advent!
Simply pin up a piece of string or ribbon in your play room and use clothes pegs to attach envelopes labelled 1 - 24 (or 25). It's up to you what goues inside each envelope, a fun activity, a small treat, let your imagination take over!
An advent calendar in your day home could be a great way of helping this time pass for the children. Here are some easy, simple ideas you could do with your children.
A paper chain advent calendar is also another easy, simple idea to set up. Simply cut out strips of paper and join the together to make the chain, you will need 25 links in total! Each day a child gets to cut a chain off and they get to see the chain get shorter! An effective way to demonstrate the movement of time to kids. For a bit of a surprise you could write an activity inside each link that you will do that day!

Finally, how about this simple envelope advent!
Simply pin up a piece of string or ribbon in your play room and use clothes pegs to attach envelopes labelled 1 - 24 (or 25). It's up to you what goues inside each envelope, a fun activity, a small treat, let your imagination take over!
More snowman craft ideas!
If it is still a little early to start thinking of those many great christmas crafts out there, think about keeping little hands busy with these simple snowman crafts! Guaranteed not to melt!

The cotton ball snowman is such a favourite with kids. Simply draw a snowman outline on paper and provide the kids with glue and cotton wool and prepare for sticky, fluffy hands! Googly eyes would be great to stick on as well as little pieces of construction paper for buttons and eyes!

A mini marshmallow snowman picture is also another great, simple craft. Again draw a snowman outline and then provide the kids with some glue and mini marshmallows to fill in the outline! Use markers to fill in eyes, nose, mouth, buttons and arms! Just make sure the kids don't try to eat it afterwards!

And finally, who can resist these cute little tube snowmen. Toilet tissue rolls, wrapping paper tubes cut down or kitchen roll tubes can all be used. You can either paint them white or cover them with white paper and then add on on a strip of coloured paper for a hat and scarf. Finally, use markers to add on buttons and a face!
A mini marshmallow snowman picture is also another great, simple craft. Again draw a snowman outline and then provide the kids with some glue and mini marshmallows to fill in the outline! Use markers to fill in eyes, nose, mouth, buttons and arms! Just make sure the kids don't try to eat it afterwards!
And finally, who can resist these cute little tube snowmen. Toilet tissue rolls, wrapping paper tubes cut down or kitchen roll tubes can all be used. You can either paint them white or cover them with white paper and then add on on a strip of coloured paper for a hat and scarf. Finally, use markers to add on buttons and a face!
Monday 19 November 2012
Snowman theme.
With the lull between Halloween and Christmas, or otherwise called November, it's sometimes difficult to think of craft ideas especially if you like to base them on a theme.
But for us in Alberta, winter has pretty much already arrived, albeit unofficially, so what better theme than snowmen!
And what better way to start than with this giant, group craft project, the snowman refridgerator!!!
This works especially well if you have a white one but if not it could also be adapted to a white door in your home!
Just cut out eyes, mouth and buttons, a carrot and a scarf from construction paper and tape it on!!
This would be a great way to start off a snowman theme on the run up to all those christmas crafts!
This idea was found on www.easypreschoolcraft.blogspot.ca.
Thursday 8 November 2012
Indoor construction site!

With the weather outside not being great for sand play how about this for a great indoor sand play idea!
These cutlery drawers can be cheaply purchased from dollar stores and with some imagination you could change up the materials you use. For example, play doh boulders, shredded paper to be scooped up or dried rice and pasta!
A great table top activity!
Super gloopy fun!
Gloop (cornflower mixed with water)

Mix an amount of cornflour gradually with water until it binds. Place in a tray or shallow container and try to pick it up! Vary the consistency occasionally and for more exploratory experiences, let the children make it themselves and feel the cornflour dry and mix it up themselves.
You also could try exploring:
- Dry or cooked spaghetti or pasta
- Cold custard
- Jelly
- Shaving foam
- Shredded paper
- Rice
- Scents such as cinnamon or lemon juice
- Food colouring
- Glitter

Messy Play in the home.

Playing with toys alone can limit opportunities to develop imagination, creativity and critical thinking. Messy play is inexpensive and open ended. Children will discover enormous numbers of opportunities for learning and play, through timeless and accessible messy play activities.
Messy play in the home
It may take a bit more time and thought when planning messy play activities but it is well worth the effort. Here are some helpful suggestions when planning messy play at home:
- Giving children craft aprons to wear will prevent getting their clothes messy. Or use big old t-shirts pulled together at the back with hair/bulldog clips for total cover.
- Take as much outdoors as possible (weather permitting!)
- Use dust sheets over furniture to protect them. Use plastic tablecloths or shower curtains on the floor depending on the activity.
- If you are playing outside, make tidying up a fun activity by letting the children wash away the chalk/paint etc on the patio using soapy water and brushes.
- If you are very anxious about the mess…think small. Messy play could just be a simple activity. E.g. a bowl of water and different containers, scented play doh or finger painting, and have a bowl of water, soap and towels ready for washing afterwards.
- The key thing to remember is to allow your child to become fully engaged with their activity and let them lead it. You can support their learning with vocabulary, posing questions and showing that you are interested and value what they are doing.
Magnet fun.

A simple, easy and fun science experiment was observed at a providers home this week involving magnets!
Collect a sample of objects from around the home (both magnetic and non magnetic), older children could be asked to do this, and place in a tub.
Give each child a magnet (you can get some large, child friendly ones cheaply from various stores) and as them to test the objects to see which ones stick to the magnet and which ones do not.
The children can then sort the objects into two tubs!
A simple way to encourage intellectual development, thinking skills, reasoning, exploration and sorting.
Afterwards the children go go around the home testing which surfaces the magnet will stick to!
Oh the weather outside is frightful.......

Stuck indoors with the kids whilst the snow is falling outside? We may not want to admit it but it does look more like winter than fall right now and so this simple craft idea may be a great way of keeping them busy.
Find more great craft ideas like this on; www.easypreschoolcraft.blogspot.ca
Thursday 1 November 2012
Are you sitting comfortably?
Then we shall begin!
Once upon a time.....................
How familiar are these words to all of us involved with children?
Story telling is an ancient tradition, revered still today in many cultures, that has stood the test of modern times and is something all of us still continue today!
With all the modern, visual electronics present in our homes today that bombard us with images, story telling is the perfect way to escape! No educationalist, child development expert or Mom would dispute the benefits of reading to and with children.
It develops their imaginations, enhances their ability to think creatively, increases their vocabulary, can encourage problem solving and questioning skills, teaches comprehension and understanding of the written and spoken word (such an important life skill), encourages the recognition of pattern through rhyming and prediction and above all is a fun, warm, caring and relaxing activity.
Dependent on your day, age of children etc, story telling may be short or long and may vary.
Do not be scared, however, of doing something different to just reading from a book! Change up story time by changing location in your day home, using puppets, incorporating actions, involving the children in making sounds, if appropriate, acting stories out or even just making one up from your head!
If you are looking for inspiration with story telling then check out the 'story station' section on www.preschoolexpress.com, it has some great tips, new stories and ideas for making story time a great experience for the kids in your day home!
Below are some of the tips mentioned on the website;
GENERAL STORY TELLING TIPS
- If the story you want to read to preschoolers is a little too involved, don’t hesitate to skip over parts of the story and make up your own transitions from one part of the story to another.
- Preschoolers love rhyme stories because they can anticipate what the words at the end of the sentences will be. Children especially love to have you leave off the last word of a four line stanza, in a rhyme story for them to shout out.
- Preschoolers like stories that are repetitive in nature. Stories like the “Three Little Pigs” or the “Three Billy Goats Gruff,” enable children to learn the repeated phrases and repeat them with you as they come up in the story.
- Preschoolers love hearing the same story over and over. They like to be able to know what will happen ahead of time.
- Complex stories are not good for young children. Some people say that you should have no more characters in a story than the age of the child (or children).
- You can also help children remember the different characters in the story by introducing them to the characters before you start reading. You can have cutouts of the characters placed on a felt board, dolls or puppets to represent them.
- Short stories are best for young children. Most story books are written for first and second grade students and may be too complex for the average Preschooler. This is why short fables, folktales and picture books are the best for this age.
Monday 22 October 2012
Halloween painting fun for toddlers!

Make a cute Halloween to picture to hang or give to someone special.
MATERIALS
- Select a stencil of your choice. Make your own, find foam shapes at a craft
supply store or educational stores have holiday stencils.
- Cut your stencil using construction paper.
- Select the color paint you want to use and then select a contrasting color
of construction paper Black with white, orange with black, purple with white or
orange are great combinations.
- Make a loop with a piece of masking tape and adhere your stencil to the
paper.

- Cut out a square or rectangular piece of sponge as shown in photo. The
rectangular shape made it easy to hold.
- Put paint on the palette. Dip sponge into paint lightly or use a brush to
apply.
- Gently stamp along all the edges of your stencil.
- Gently lift stencil and place in another location.
- Repeat if desired.
- Let dry.
- Frame or mat onto another construction paper for a nice effect.
TIPS AND SUGGESTIONS
EDUCATIONAL TIPS
Another useful blog to check out!
Looking for some inspiration?
Then check out this blog, that has been tried and tested by a fellow provider, as a valuable resource for activity ideas.
www.playathomemom3.blogspot.ca
The blog has activities used by Moms with their own children at home and shows great step by step instructions with lots of photographs.
On the left hand side is a list of different themed activities for you to explore!
Monday 15 October 2012
It's a spooky time of year!
The shops are full of costumes, spooky decorations and massive boxes of candy and the kids are already excited about Halloween! It's a great time of year to have an entire themed day of dressing up, turning your play room into a haunted house, eating spooky snacks and just generally having fun!
Below are some ideas that will help you plan your spooky fun with something that we all have hanging around our home ....... toilet rolls!

Directions:

Directions:
Ghost
Jack-O-Lantern
Frankenstein
Mummy
Bat
Below are some ideas that will help you plan your spooky fun with something that we all have hanging around our home ....... toilet rolls!

Such a simple idea!
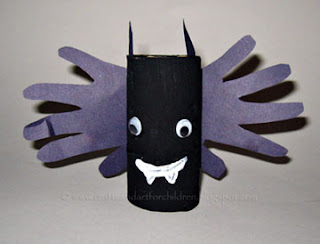
Here's a cute Halloween bat made from a toilet roll with handprint wings.
Materials:
- toilet roll
- black an white paint
- black and purple construction paper
- scissors
- glue
- google eyes
Directions:
- Paint the toilet roll black or completely cover in black paper.
- Trace hands on purple paper and cut out.
- Glue hand prints to the back of the toilet roll for wings.
- Cut little triangles from black paper and and glue on the top for ears.
- Glue on 2 google eyes.
- draw a mouth and teeth with white paint or white out.
You can make your own collection of these Halloween toilet roll monsters. All you need are toilet paper rolls, a few decorating materials and imagination.
Materials:
Materials:
- toilet paper rolls
- black, orange, green, and white paint
- crepe paper streamers(white and green)
- scissors
- glue
- google eyes
- black marker
- mini marshmallows(for Frankenstein's electrodes)
- black construction paper(for the bat, not pictured)
Directions:
Ghost
- Paint the toilet roll all white.
- Draw eyes and mouth with a marker
Jack-O-Lantern
- Paint all orange.
- Draw a face.
- Stuff some green crepe paper inside for the stem.
Frankenstein
- Paint the top black and the rest green.
- Cut slits at the top for spiky hair.
- Draw mouth or scar.
- Glue on google eyes.
- Glue on mini-marshmallows for electrodes.
Mummy
- Cover toilet roll in glue and wrap in white crepe paper.
- Glue on eyes.
Bat
- Paint all black.
- Cut out 2 simple wings from black paper and glue on.
- Glue on google eyes.
Wednesday 10 October 2012
Another great website to check out!
Check out this great and easy to use website;
www.preschoolexpress.com
It's full of ideas on various themes and every month produces an activity calendar for toddler and pre school activity ideas! A useful tool for those weeks when the ideas are not exactly flowing!!
www.preschoolexpress.com
It's full of ideas on various themes and every month produces an activity calendar for toddler and pre school activity ideas! A useful tool for those weeks when the ideas are not exactly flowing!!
Tuesday 2 October 2012
A quick, easy and simple thanksgiving craft!

This Thanksgiving Day rainbow turkey handprint craft is beautiful and easy to make.
Materials:
- rainbow colored paints
- paintbrushes
- white paper
- black marker
Directions:
- Paint child's palm green, thumb red, bottom of the fingers yellow, and tops of the fingers light and dark blue.
- Press hand onto white paper. Add a pink finger print for the beak and waddle. Allow to dry.
- Draw simple legs and an eye with a black marker.
Tuesday 25 September 2012
Fall leaves.
Fall is such a beautiful time of year and fallen leaves provide so many fun activities for the children in your day home.
It's a great time of year to get outside for a fall walk, collect leaves along the way, make leaf piles to jump into and return to your day home with a number of leves to use for some in expensive crafts.
The photos below show some quick and easy ideas to use as a follow up activity once you've had your outdoor fun!
 How about using the leaves for a fun sticking activity?
For younger children draw a tree trunk for them to glue the leaves on to, older children may be able to draw the tree trunk themselves.
Provide the children with a variety of leaves to use, some will use all the same, others may be more creative.
 Or how about making an attractive wreath for your home or front door?
Simply cut out a circle of cardboard (empty cereal boxes make a great source of cardboard) and get the children to glue the leaves all around the circle. Encourage them to overlap so none of the cardboard is showing.
If you have some spare ribbon in a fall colour this can be taped to the back to hang the wreath or a piece of string or yarn would suffice.
 Or maybe try this fun craft!
Simply glue a leaf to a popsicle stick and add googly eyes for a simple leaf puppet!
The children could then tell the story of their walk, or a story of a leaf or use them to act out a poem or a fall song!
 And finally, everyone's favourite fall craft, leaf printing!
Supply the children with some leaves and paint and paper.
Encourage the children to paint the rough side of the leaf (the side with all the veins) and then lay the leaf onto the paper and press down to print.
Fall colours always look great but why not experiment with non fall colours and let the children be creative!
It's a great time of year to get outside for a fall walk, collect leaves along the way, make leaf piles to jump into and return to your day home with a number of leves to use for some in expensive crafts.
The photos below show some quick and easy ideas to use as a follow up activity once you've had your outdoor fun!

For younger children draw a tree trunk for them to glue the leaves on to, older children may be able to draw the tree trunk themselves.
Provide the children with a variety of leaves to use, some will use all the same, others may be more creative.

Simply cut out a circle of cardboard (empty cereal boxes make a great source of cardboard) and get the children to glue the leaves all around the circle. Encourage them to overlap so none of the cardboard is showing.
If you have some spare ribbon in a fall colour this can be taped to the back to hang the wreath or a piece of string or yarn would suffice.
Simply glue a leaf to a popsicle stick and add googly eyes for a simple leaf puppet!
The children could then tell the story of their walk, or a story of a leaf or use them to act out a poem or a fall song!
Supply the children with some leaves and paint and paper.
Encourage the children to paint the rough side of the leaf (the side with all the veins) and then lay the leaf onto the paper and press down to print.
Fall colours always look great but why not experiment with non fall colours and let the children be creative!
Tuesday 18 September 2012
Check out this blog!
A blog that has been tried and tested by another day home provider is always a sure sign that it is a good one!
The following blog was recommended as an excellent resource for pre school crafts. It has great photos of the crafts, easy explanations and lots and lots of ideas to keep you going all year long.
Just follow this link;
www.easypreschoolcraft.blogspot.ca
The following blog was recommended as an excellent resource for pre school crafts. It has great photos of the crafts, easy explanations and lots and lots of ideas to keep you going all year long.
Just follow this link;
www.easypreschoolcraft.blogspot.ca
Need planning ideas?
Why not invest in this book?
A day home provider has recommend this book, available for $33 at Scholars Choice, as a great investment for ideas for activity planning.
It is simple and easy to use and would make a great reference when you just cannot think of anymore ideas to keep all your little ones busy!

A day home provider has recommend this book, available for $33 at Scholars Choice, as a great investment for ideas for activity planning.
It is simple and easy to use and would make a great reference when you just cannot think of anymore ideas to keep all your little ones busy!

Monday 10 September 2012
Science fun in your day home.
Kids love fun science experiments and they are such a great way to encourage them to talk about what they see happening and to start to explain why!
Even young kids can make a simple prediction about what they think may happen and then just watch the look on their faces when something does!
As the weather begins to turn, a day home provider begins to think more about indoor activities and some fun science is just the answer!
www.sciencebob.com has lots of simple experiments that can be done with things in your home! Maybe a great way of keeping your non nappers quiet while the younger ones sleep!
This one is our particular favourite:
Blobs in a bottle.
 You will need:
- A clean 1 litre clear pop bottle
- 3/4 cup of water
- Vegetable oil
- Food colouring
- Fizzing tablets (such as Alka Seltzer)
What to do:
- Pour water into the bottle
- Slowly pour vegetable oil into the bottle, using a funnel or a measuring cup, until bottle is almost full. You may have to wait a short while until water and oil separate.
- Add 10 drops of food coloring to the bottle (we like red, but any color will look great.) The drops will pass through the oil and then mix with the water below.
- Break a seltzer tablet in half and drop the half tablet into the bottle. Watch it sink to the bottom and let the blobby greatness begin!
- To keep the effect going, just add another tablet piece. For a true lava lamp effect, shine a flashlight through the bottom of the bottle.
An alternate experiment involves adding water and oil to a small pop or juice bottle along with food colouring and glitter. Screw the lid back on and watch the kids have fun shaking the bottle and watching the glitter!
Art gallery.

Running out of space on your closet door to display day home art work? Well why not use this simple idea seen in one of our day homes to create a beautiful art gallery!
Simply hang a length of string on a wall in your play room or play area and attached the art work with clothes pins!
Very simple and very effective! I'm sure the kids will love 'pegging out' their art work!
Monday 13 August 2012
Back to school craft!
 With three weeks to go before school resumes I know many of us are still trying to complete our to do list of activities that ten weeks ago seemed possible! However, the return to school is looming and for many of us our thoughts turn to how we can help prepare our children for the school year ahead.
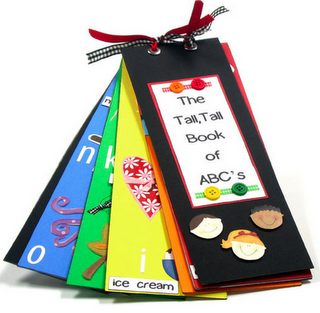
If you have children starting pre school or kindergarten or even grade one you may like to start the children on this ongoing project.
An ABC book created by the child themself would be something they would treasure and would enjoy practising their ABC knowledge from. Creating it themselves also gives them ownership over the book by aloowing them to decided what pictures go in it! It will be a great reflection of their interests at the time also.
To create the book you will need 26 pieces of cardboard cut into rectangles or squares plus a front cover, yarn or string to join it together, pictures and decorations, glue, scissors and a pencil.
Use one piece of card for each letter. (You may wish to pre prepare these with a letter stcker or by writing the letter on, show the capital and lower case version of each letter also ie Ee)
Encourage the children to draw pictures or find pictures to cut out and glue on for that letter and decorate the card. You may wish to label each picture as well.
I would suggest creating the books over a number of days to avoid the children becoming bored, it could be a special project at quiet time for those who do not nap!
Once completed , create a fromt cover (My ABC's plus the child's name work well) and join together.
This idea could also be adapted to make a colour book, numbers 1 - 10, my book of animals, vehicles etc.
For more craft ideas check out www.ohmycrafts.blogspot.ca where this craft idea came from.
Tuesday 7 August 2012
Water fun in the sun.
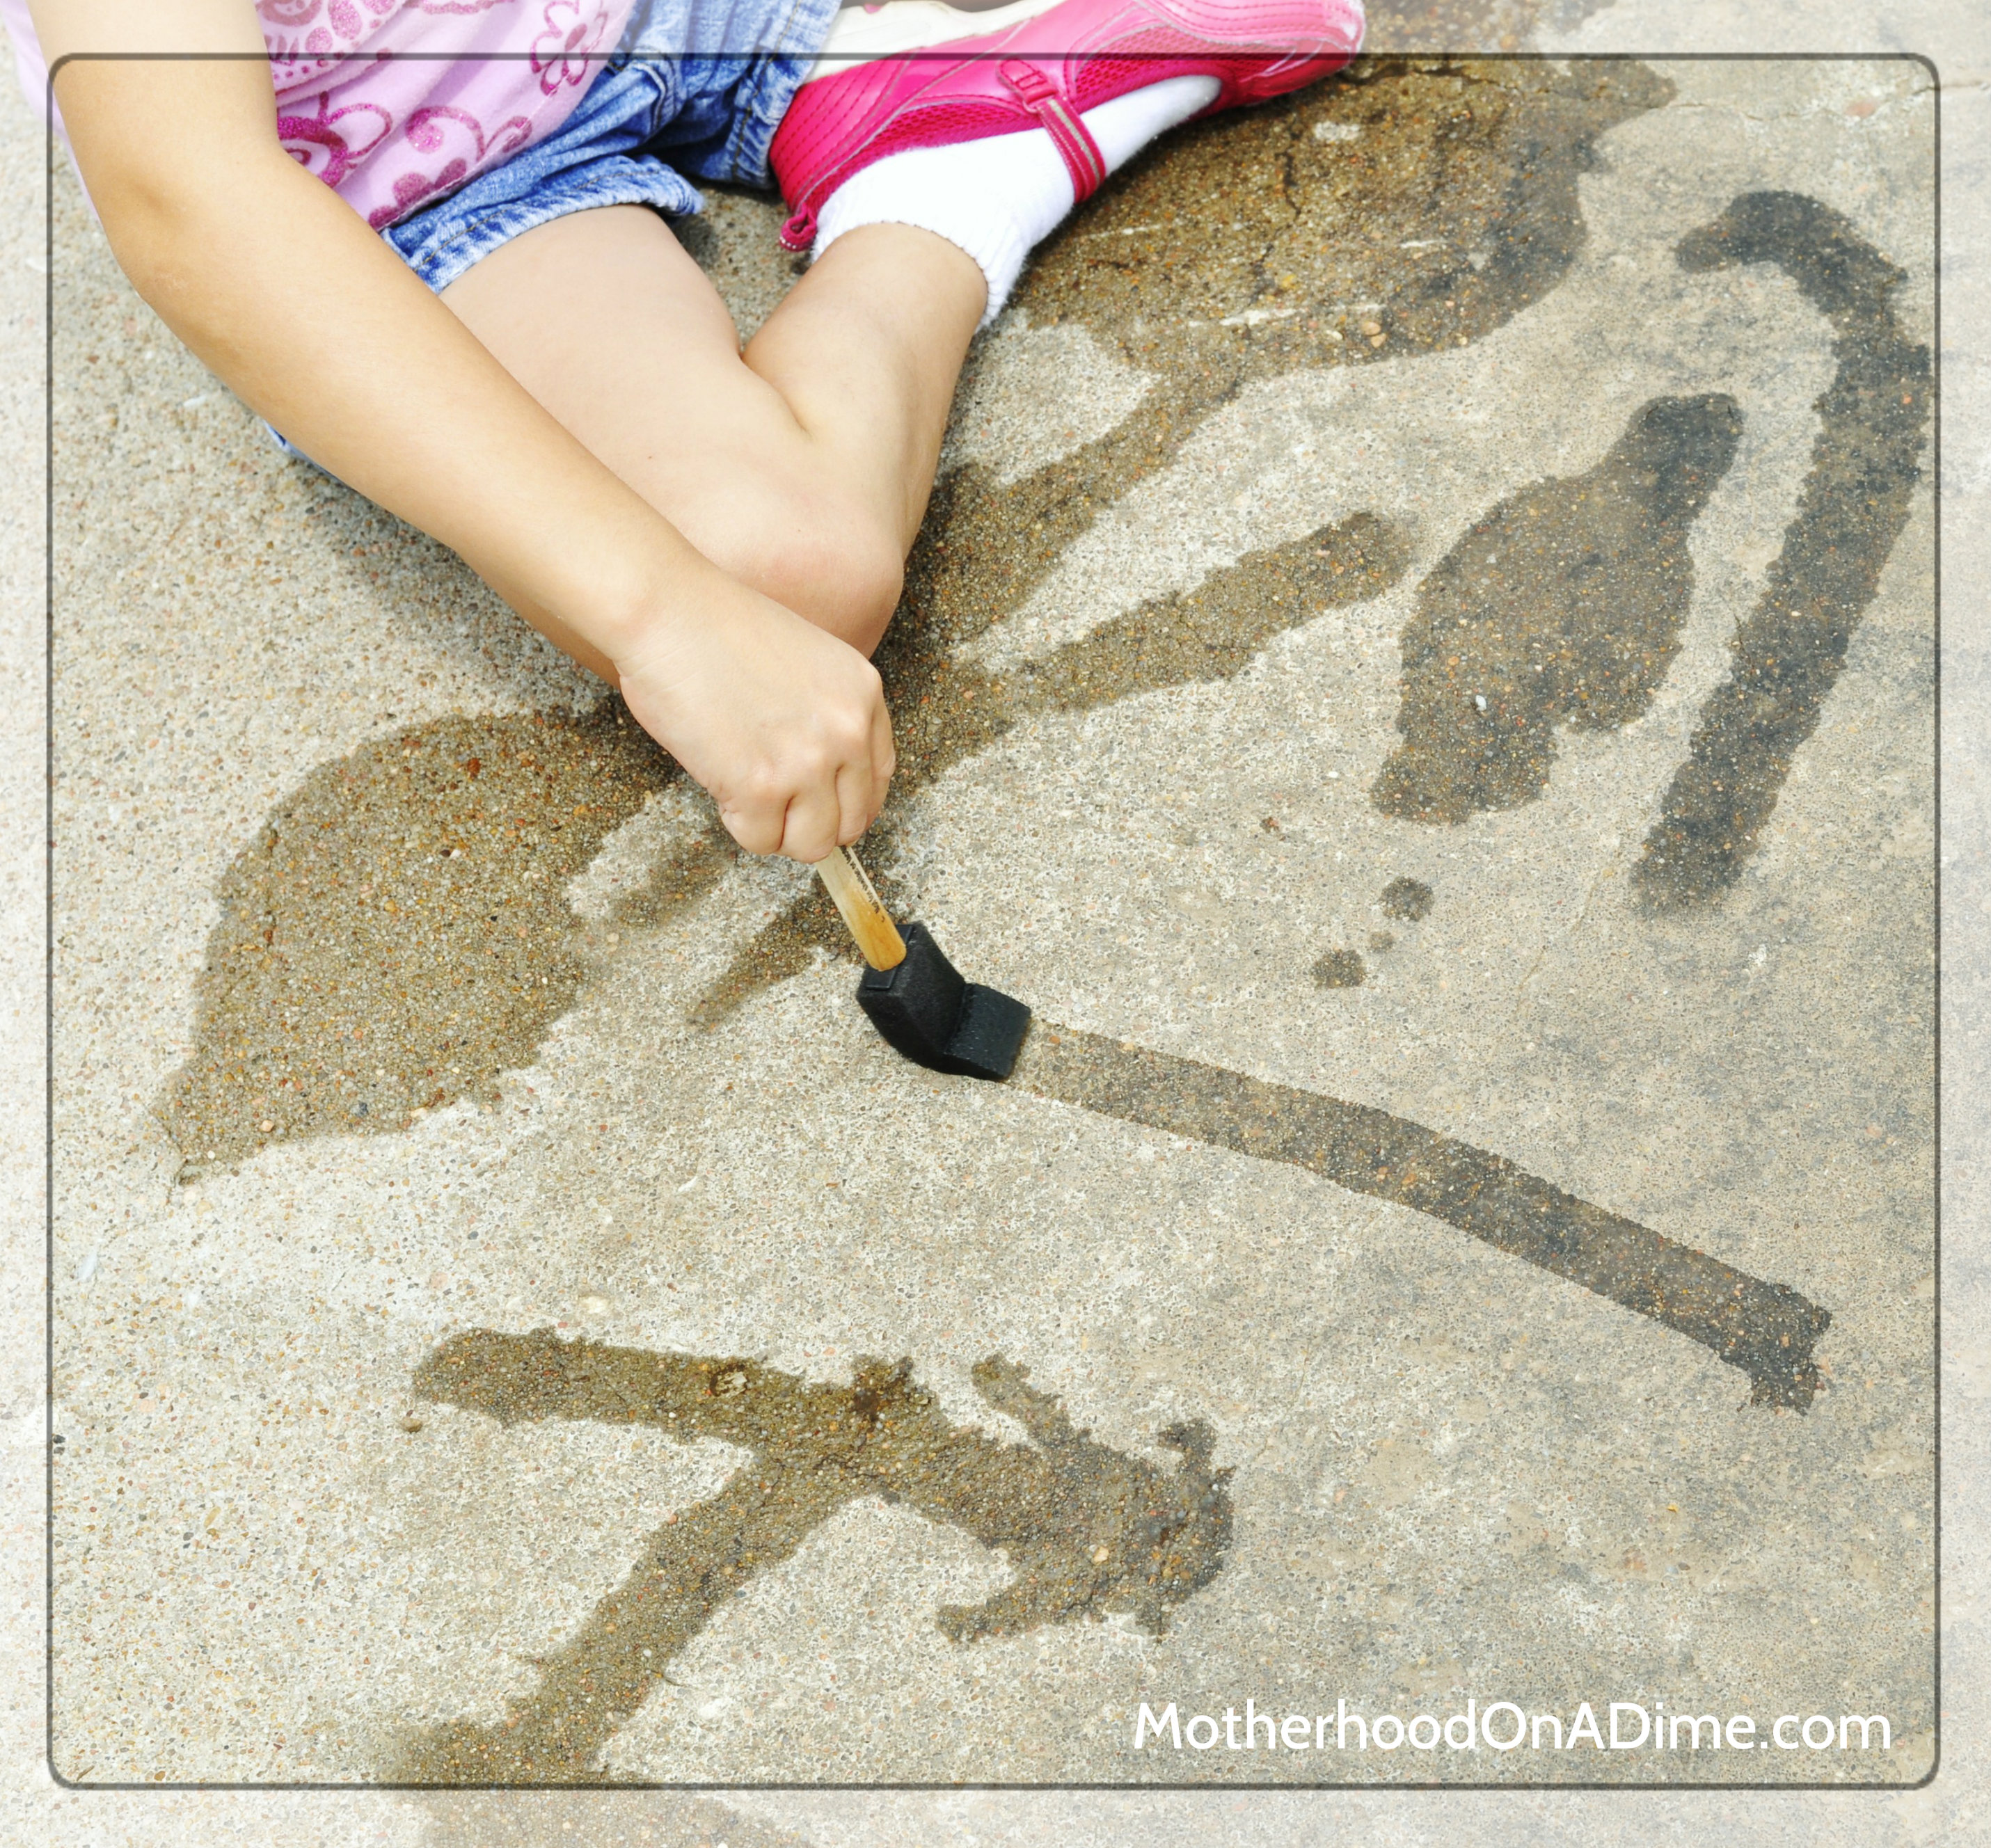
There are so many free or cheap activities that can keep children occupied in the summer and here is a great one to do on a sunny day.
Provide the children with buckets of water and various painting tools and then let your driveway or a patio be their canvas.
The kids will have great fun painting their pictures, being creative and developing their fine motor skills and, best of all, the sun will dry them up and they can start again!
A great idea would be to photograph their works of art.
An alternate activity would be to get the children to 'paint' the fence, if you have wooden fencing around your back yard.
Loads of sunny, water fun and no mess to clear up afterwards!
1 foot and 2 hands makes a lobster?

Check out this very simple painting activity seen at a day home last week. A great idea that could easily be done outside to avoid foot prints on your floor.
Paint each hand and make a print on the top of the paper, then paint a foot and print below.

For a variation you could add googly eyes, or have glitter in the paint for a sparkling lobster or add some shreads of green tissue paper to make sea weed!
Olympic sports fun!
A couple of weeks ago, myself and some of our providers enjoyed a couple of hours in the sunshine celebrating the start of the Olympics in England with our very own olympic event!
Why not try out some of these fun games and races in your own back yard or at the local park!
Why not try out some of these fun games and races in your own back yard or at the local park!
- Hug a ball race - You need one ball and two children. Each pair hugs a ball between them and race to the finish line trying not to drop the ball.
- Egg and spoon race - A classic, fun race! We used plastic spoons and the plastic easter eggs to run this race!
- The straw race - Line the children up and place a drinking straw between their top lip and their nose. Encourage the children to curl up their top lip to hold the straw in place. They then race to the finish line trying to keep the straw in place.
- Hula hoop race - A wiggly race! Try to get from the start to the finish line whilst keeping a hula hoop spinning around your middle.
- High jump - Use a skipping rope or a swimming noodle to form the jump and move it up a little each time. When you have finished that hold it higher and have a limbo competition.
- Shot put - replace a heavy shot with a tennis ball or a small soft ball and see who can throw the furthest.
- Finally, running races which are enjoyed by all. Crepe paper steamers make a great finish line that the children can break. Have them run forwards, run backwards, jump, hop, roll!
Thursday 19 July 2012

Olympic Fever.
Here is a great idea that is really simple to do to get your kids into the Olympic spirit! The opening ceremony is on Friday July 27th and on Monday we shall be holding our very own Play Days olympics with fun races and games for the children to in.
These flags have been made using 3 triangles of construction paper joined together. The children then decided upon a team name for their day home team and wrote this on the flags and added decoration.
Finally they attached the flags to a straw (or you could use a popsicle stick or similiar) with tape!
The flags will look great when the children parade with them waving them high in the air at our very own opening ceremony!
If you cannot make our Olympics event why not do your own smaller version in your back yard!
Welcome.
Hi everyone and welcome to the Play Days Family Day Home Provider Blog.
The blog is designed to be a resource that you can access on a regular basis to look for new ideas for crafts, activities, menu planning or new places to play as well as ideas of things you may like to try in your day home.
It shall be updated regularly so don't forget to check it.
I hope you find this a useful resource! Feedback will be most welcome on things you would like to see or on ideas you tried and how they went. So please feel free to comment.
I'd love to include as many tried and tested ideas from all of you as day home providers so if you have some please email them to me and I will post them! Photos of craft ideas will be great but please make sure no children are on photos! No images of children or names will be included in blog!
Enjoy!
Subscribe to:
Posts (Atom)